
Introduction
When building a web application, it's often useful to show a preview of a link's content—like how social media platforms show link previews when you share a URL. So instead of just url text you can show og informations like pictures and desccription as well, beside url.
In this post, I'll walk you through embedding links in a React app, while fetching Open Graph metadata (such as title, image, and description) using axios and cheerio for scraping the target page's HTML.
We’ll create a simple EmbeddedLink component that fetches and displays Open Graph metadata for any provided URL.
Prerequisites
Before we start, make sure you have the following installed:
- React – Set up a React project using Create React App or any method you prefer.
- Axios – For making HTTP requests.
- Cheerio – For parsing and scraping HTML (a server-side jQuery-like library usually used for scraping).
Implementation
You can install Axios and Cheerio using the following commands:
npm install axios cheerio
Creating the EmbeddedLink Component
We'll create a new EmbeddedLink component that takes in a url as a prop and fetches the Open Graph metadata from that link which we will use later on. Here's the full code:
import React, { useState, useEffect } from 'react'; import axios from 'axios'; import cheerio from 'cheerio'; const EmbeddedLink = ({ url }) => { const [loading, setLoading] = useState(true); const [error, setError] = useState(null); const [imageUrl, setImageUrl] = useState(''); const [title, setTitle] = useState(''); const [description, setDescription] = useState(''); useEffect(() => { const fetchOGData = async () => { try { const response = await axios.get(url, { headers: { 'origin': 'https://mysite.com' } }); const html = response.data; // Parse HTML content using Cheerio const $ = cheerio.load(html); const ogImage = $('meta[property="og:image"]').attr('content'); const ogTitle = $('meta[property="og:title"]').attr('content'); const ogDesc = $('meta[property="og:description"]').attr('content'); setImageUrl(ogImage || ''); setTitle(ogTitle || ''); setDescription(ogDesc || ''); setLoading(false); } catch (error) { setError(error); setLoading(false); } }; fetchOGData(); }, [url]); if (loading) return <div>Loading...</div>; if (error) return <div>Error: {error.message}</div>; return ( <div className="embedded-link border-2 p-5 my-3 border-neutral-800"> {imageUrl && <img src={imageUrl} alt={title} className="cover-image max-w-50 w-auto h-auto" />} <a href={url} target="_blank" rel="noopener noreferrer" className="text-indigo-500 underline font-bold text-2xl"> {title && <h3>{title}</h3>} </a> {!imageUrl && !title && <p>No preview available</p>} <p className="my-3">{description}</p> <p className="text-slate-500">{url}</p> </div> ); }; export default EmbeddedLink;
Using the EmbeddedLink Component
You can now use the EmbeddedLink component in your React app like this:
import React from 'react'; import EmbeddedLink from './EmbeddedLink'; function App() { return ( <div className="App"> <h1>Link Preview Example</h1> <EmbeddedLink url="https://example.com" /> </div> ); } export default App;
This will render a preview of the URL provided, with its image, title, and description.
Handling Errors and Loading States
We handle potential errors and loading states by showing appropriate messages to the user:
- While the metadata is being fetched, a simple "Loading..." message is shown or you can use some animation spinner or whatever.
- If something goes wrong during the fetch (e.g., a network issue), the error message is displayed.
Conclusion
When you are done, you should be able to see result like on the picture below.
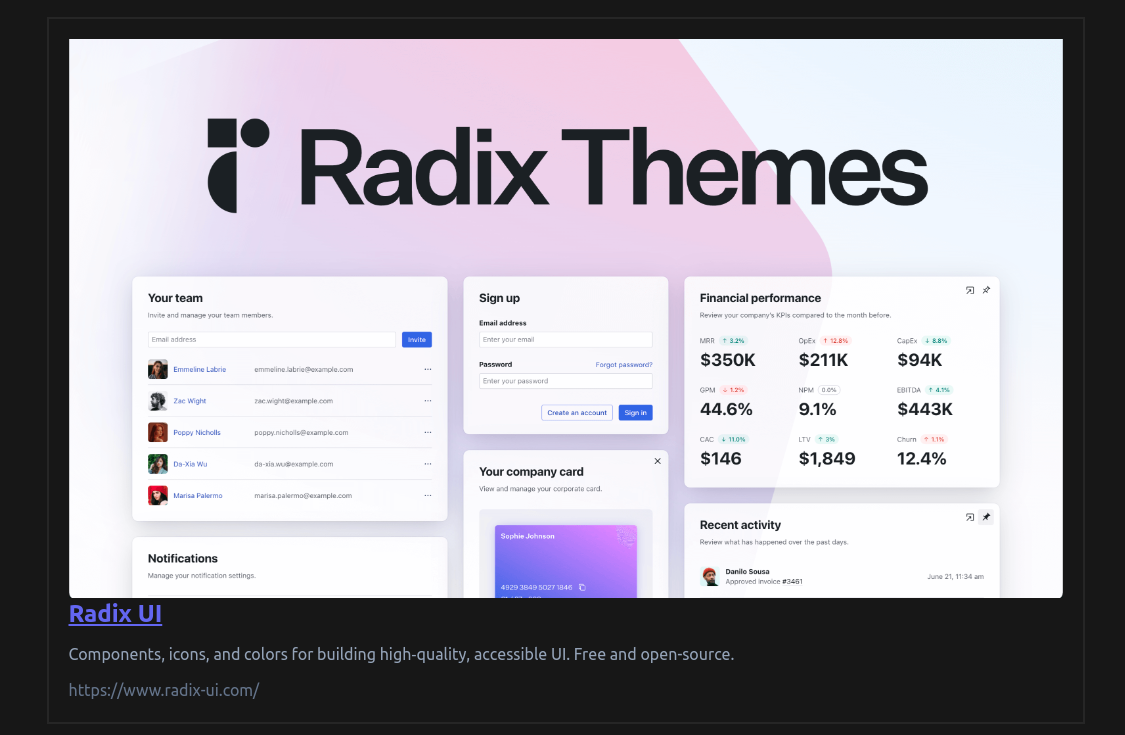
I prefer this dev.to embedded link style, but you can style it whatever you like and prefer.